OAuth是一个关于授权(authorization)的开放网络标准,在全世界得到广泛应用,目前的版本是2.0版。国内的新浪,百度,QQ登录,微信登录等等都是运用的该协议。目前需要在其他正在开发的项目中使用另一个项目的账号来作为登录账号,那么就需要运用这个协议来实现。
关于OAuth的原理可以参考如下这两篇文章:
- http://www.ruanyifeng.com/blog/2014/05/oauth_2_0.html
- http://desert3.iteye.com/blog/1701626
OAuth2 Server PHP 是用PHP语言来实现OAuth2 Server的扩展程序。
- 下载地址:https://github.com/bshaffer/oauth2-server-php
下载及安装过程略。
总体思路是:
用户输入账号密码进行登录–》获取授权码(Authorization_code,默认有限期30秒)–》获取令牌(Access_token,默认有效期1小时)–》获取用户信息
使用步骤:
1.在数据库中新建几张表,这几张表是OAuth Server PHP必须要用到的表:
CREATE TABLE `oauth_access_tokens` (
  `access_token` varchar(40) NOT NULL,
  `client_id` varchar(80) NOT NULL,
  `user_id` varchar(255) DEFAULT NULL,
  `expires` timestamp NOT NULL,
  `scope` varchar(2000) DEFAULT NULL,
  PRIMARY KEY (`access_token`)
) ENGINE=MyISAM DEFAULT CHARSET=utf8;

CREATE TABLE `oauth_authorization_codes` (
 `authorization_code` varchar(40) NOT NULL,
 `client_id` varchar(80) NOT NULL,
 `user_id` varchar(255) DEFAULT NULL,
 `redirect_uri` varchar(2000) DEFAULT NULL,
 `expires` timestamp NOT NULL,
 `scope` varchar(2000) DEFAULT NULL,
 PRIMARY KEY (`authorization_code`)
) ENGINE=MyISAM DEFAULT CHARSET=utf8;

CREATE TABLE `oauth_clients` (
 `client_id` varchar(80) NOT NULL,
 `client_name` varchar(150) DEFAULT NULL,
 `client_secret` varchar(80) NOT NULL,
 `redirect_uri` varchar(2000) NOT NULL,
 `grant_types` varchar(80) DEFAULT NULL,
 `scope` varchar(100) DEFAULT NULL,
 `user_id` varchar(80) DEFAULT NULL,
 PRIMARY KEY (`client_id`)
) ENGINE=MyISAM DEFAULT CHARSET=utf8;

CREATE TABLE `oauth_refresh_tokens` (
 `refresh_token` varchar(40) NOT NULL,
 `client_id` varchar(80) NOT NULL,
 `user_id` varchar(255) DEFAULT NULL,
 `expires` timestamp NOT NULL,
 `scope` varchar(2000) DEFAULT NULL,
 PRIMARY KEY (`refresh_token`)
) ENGINE=MyISAM DEFAULT CHARSET=utf8;

CREATE TABLE `oauth_scopes` (
 `scope` text,
 `is_default` tinyint(1) DEFAULT NULL
) ENGINE=MyISAM DEFAULT CHARSET=utf8;
2.插入测试客户端数据:
INSERT INTO `oauth_clients` (`client_id`, `client_name`, `client_secret`, `redirect_uri`) VALUES (‘testclient’, ‘测试客户端’, ‘testpass’, ‘http://www.client.com/oauth’)
3.服务器端新建Oauth控制器,代码如下:
class oauth extends BaseController
{
private $storage; //数据库链接
private $server; //OAuth2服务
public function __construct()
{
\OAuth2\Autoloader::register(); //注册OAuth2服务
$dsn = "mysql:dbname=dbname;host=127.0.0.1";
$this->storage = new \OAuth2\Storage\Pdo(array('dsn' => $dsn, 'username' => 'root', 'password' => '123456'));
$this->server = new \OAuth2\Server($this->storage);
}
/**
* 获取令牌(access_token)
*/
public function token()
{
$this->server->addGrantType(new \OAuth2\GrantType\ClientCredentials($this->storage));
$this->server->addGrantType(new \OAuth2\GrantType\AuthorizationCode($this->storage));
$this->server->handleTokenRequest(\OAuth2\Request::createFromGlobals())->send();
}
/**
* 通过令牌获取用户信息
*/
public function resource()
{
if (!$this->server->verifyResourceRequest(\OAuth2\Request::createFromGlobals())) {
$this->server->getResponse()->send();
die;
}
$token = $this->server->getAccessTokenData(\OAuth2\Request::createFromGlobals());
//$token['user_id']就是用户id,然后再通过user_id在数据库里查询用户信息并返回即可。
echo "User ID associated with this token is {$token['user_id']}";
}
public function authorize()
{
$request = \OAuth2\Request::createFromGlobals();
$response = new \OAuth2\Response();
// validate the authorize request
if (!$this->server->validateAuthorizeRequest($request, $response)) {
$response->send();
exit();
}
// display an authorization form
if($_POST['authorized']){
$is_authorized = ($_POST['authorized']=='yes');
$userid = $_SESSION['userid']; //用户的id
$this->server->handleAuthorizeRequest($request, $response, $is_authorized,$userid);
if ($is_authorized) {
//同意授权
//保存用户授权的选项(略)
//生成授权码(Authorization Code)
$code = substr($response->getHttpHeader('Location'), strpos($response->getHttpHeader('Location'), 'code=')+5, 40);
//exit("SUCCESS! Authorization Code: $code");
$response->send();exit();
}else{
//没有授权
}
}else{
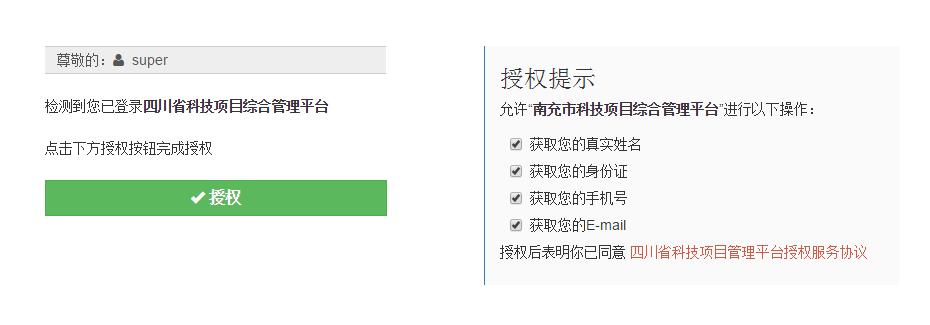
//展示授权视图
exit('<form method="post"><label>Do You Authorize TestClient?</label><input name="authorized" type="submit" value="yes" /> <input name="authorized" type="submit" value="no" /></form>');
}
}
}
4.登录: 登录的逻辑省略,登录成功后,跳转到授权页面,授权页面的URL形式为:http://www.server.com/oauth/authorize?response_type=code&client_id=testclient&redirect_uri=http://www.client.com/oauth&state=xyz 授权页面中的client_id和redirect_uri必须和之前插入的测试数据的值保持一致。
5.授权(得到授权码):

授权视图页面的表单中添加一个隐藏域,名为authorized,值为yes
当登录后,访问控制器中的authorize方法,第一次是展示授权的页面,用户点击授权按钮,提交表单后,获得授权码,此时,程序会将授权码以及user_id保存到数据库的oauth_authorization_codes表中。
最后程序会自动将授权码拼接到回调地址中并返回,形如:http://www.client.com/oauth?code=xxxxx&state=xyz
6.客户端通过授权码获取令牌,再通过令牌获取用户信息:
客户端的回调页面添加如下方法:
public function oauth()
{
    //1.得到授权码(Authorization Code)
    $code = $_GET['code'];
    //2.通过授权码得到令牌(Access_token)
    $post_data = array(
        'grant_type'=>'authorization_code',
        'client_id'=>'testclient',
        'client_secret'=>'testpass',
        'redirect_uri'=>'http://www.client.com/oauth',
        'code'=>$code
    );
    $result = $this->post('http://www.server.com/oauth/token',$post_data);
    $result = json_decode($result,true);
    $token = $result['access_token'];
    if(!$token) exit("获取令牌失败");
    //3.通过令牌获取用户基本信息
    $userinfo = $this->post('http://www.server.com/oauth/resource',['access_token'=>$token]);
    $userinfo = json_decode($userinfo,true);
    print_r($userinfo);exit();
}


// 发送post请求
// @param string $url 请求地址
// @param array $post_data post键值对数据
// @return string
public function post($url, $post_data){
    $o="";
    foreach ($post_data as $k=>$v)
    {
        $o.= "$k=".urlencode($v)."&";
    }
    $post_data=substr($o,0,-1);
    $ch = curl_init();
    curl_setopt($ch, CURLOPT_POST, 1);
    curl_setopt($ch, CURLOPT_HEADER, 0);
    curl_setopt($ch, CURLOPT_URL,$url);
    curl_setopt($ch, CURLOPT_POSTFIELDS, $post_data);
    curl_setopt($ch, CURLOPT_RETURNTRANSFER,1);
    $result = curl_exec($ch);
    curl_close($ch);
    return $result;
}
